使用Mix创建命令行工具

注意

网上的很多文档中的说明都使用了mix escriptize命令用于生成命令行工具, 在最新的Elixir版本中被改为mix escript.build, 请注意!

用Mix创建一个项目骨架

mix是一个Elixir自身支持的项目管理工具, 支持的功能有:

  • 创建基本项目目录结构
  • 管理依赖
  • 编译
  • 发布

下面我们使用mix来创建一个命令行工具的项目目录

mix new commandlinetools
cd commandlinetools

项目创建好以后, 编辑项目目录下的mix.exs项目描述文件, 在project函数内添加escript配置,并添加escript函数,如下:

def project do
  [app: :commandlinetools,
   version: "0.0.1",
   elixir: "~> 1.0",
   deps: deps,
   escript: escript
   ]
end
def escript do
  [main_module: Commandlinetools]
end

main_module 选项指定了命令行工具的入口模块, 该模块必须实现一个main/1函数, 打开lib/commandlinetools.ex, 实现main/1函数

defmodule Commandlinetools do
    def main(args) do
        IO.puts("命令行工具main函数实现")
    end
end

编译,生成可执行程序

root@0b85dcd174f2:~/ejabberd/elixir/commandlinetools# mix escript.build
lib/commandlinetools.ex:2: warning: variable args is unused
Compiled lib/commandlinetools.ex
Generated commandlinetools.app
Consolidated List.Chars
Consolidated Range.Iterator
Consolidated String.Chars
Consolidated Enumerable
Consolidated Access
Consolidated Inspect
Consolidated Collectable
Consolidated protocols written to _build/dev/consolidated
Generated escript commandlinetools with MIX_ENV=dev

运行

root@0b85dcd174f2:~/ejabberd/elixir/commandlinetools# ./commandlinetools
命令行工具main函数实现

依赖管理

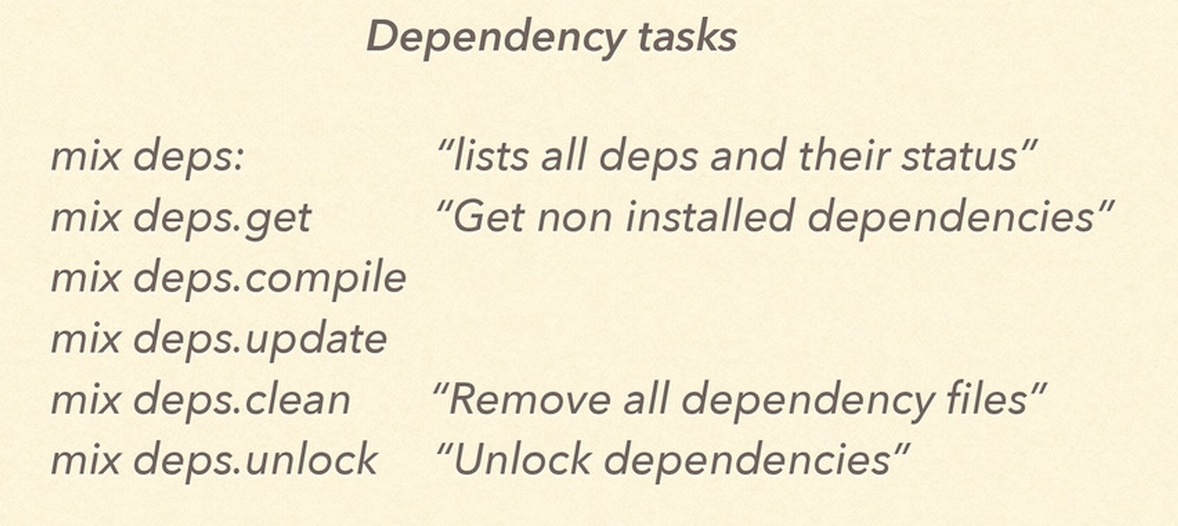
Elixir依赖管理命令

1
mix deps            # 显示所有依赖包极其状态
mix deps.get        # 下载未安装的依赖包
mix deps.compile    # 编译依赖包
mix deps.update     # 更新依赖包
mix deps.clean      # 删除所有依赖文件
mix deps.unlock     # 解锁依赖

Mix 和 OTP 任务以及gen_tcp

这章将学习如何使用Erlang的:gen_tcp模块处理请求. 后续章节我们会扩展服务器使之能处理命令. 还提供了一个极好的机会探索Elixir的Task模块

Echo服务器

首先通过实现一个echo服务器,开始学习TCP服务器. 它只是把接收到的文本返回给客户端. 我们慢慢的改进服务器直到它能够处理多个连接.

一个TCP服务器, 大致会执行如下步骤:

  • 监听端口并获得套接字
  • 等待客户端连接该端口,并Accept.
  • 读取客户端请求并回写响应

下面来实现这些步骤, 转到apps/kv_server应用程序, 打开lib/kv_server.ex,添加下面的函数:

def accept(port) do
  # The options below mean:
  #
  # 1. `:binary` - receives data as binaries (instead of lists)
  # 2. `packet: :line` - receives data line by line
  # 3. `active: false` - block on `:gen_tcp.recv/2` until data is available
  #
  {:ok, socket} = :gen_tcp.listen(port,
                    [:binary, packet: :line, active: false])
  IO.puts "Accepting connections on port #{port}"
  loop_acceptor(socket)
end
defp loop_acceptor(socket) do
  {:ok, client} = :gen_tcp.accept(socket)
  serve(client)
  loop_acceptor(socket)
end
defp serve(client) do
  client
  |> read_line()
  |> write_line(client)
  serve(client)
end
defp read_line(socket) do
  {:ok, data} = :gen_tcp.recv(socket, 0)
  data
end
defp write_line(line, socket) do
  :gen_tcp.send(socket, line)
end

调用KVServer.accept(4040)启动服务器, 4040为端口. 在accept/1中第一步是监听端口直到获得一个可用的套接字, 然后调用loop_acceptor/1. loop_acceptor/1仅仅是循环地接受客户端连接. 对于每个接受的连接, 调用serve/1.

serve/1是另一个循环调用, 其从套接字读取一行数据并把读取到的行写回套接字. 注意函数serve/1使用管道操作符 |> 来表达操作流.管道操作符对左边的表达式求值并把结果作为右侧函数的第一个参数传递. 上面的例子:

socket |> read_line() |> write_line(socket)

等同于:

write_line(read_line(socket), socket)

当使用 |> 操作符时, 由于操作符优先级的问题, 给函数调用添加必要的括号是非常重要的, 特别是, 这段代码:

1..10 |> Enum.filter &(&1 <= 5) |> Enum.map &(&1 * 2)

实际上会转换为:

1..10 |> Enum.filter(&(&1 <= 5) |> Enum.map(&(&1 * 2)))

这不是我们想要的结果, 因为传递给Enum.filter/2的函数作为给Enum.map/2的第一个参数传递, 解决办法是使用括号:

# 译注: 虽然Elixir的函数调用通常情况下可以不使用括号,
# 但是为了避免歧义或不必要的问题,建议所有函数调用其他语言中必须的括号风格
1..10 |> Enum.filter(&(&1 <= 5)) |> Enum.map(&(&1 * 2))

read_line/1函数实现使用:gen_tcp.recv/2从套接字接收数据, write_line/2使用:gen_tcp.send/2向套接字写入数据.

使用命令iex -S mixkv_server应用程序中启动一个iex会话. 在IEx中运行:

iex> KVServer.accept(4040)

服务器现在开始运行, 终端被阻塞. 我们使用 telnet客户端访问我们的服务器. 它在大多数操作系统中都有, 其命令行参数通常类似:

$ telnet 127.0.0.1 4040
Trying 127.0.0.1...
Connected to localhost.
Escape character is '^]'.
hello
hello
is it me
is it me
you are looking for?

键入hello, 并敲击回车, 你会的到服务器的hello响应, 太棒了!

我的telnet客户端可以通过键入ctrl + ], quit, 并敲击 <Enter>退出, 你的客户端可能有不同的步骤:

退出telnet客户端后, 你可能会在IEx(Elixir Shell)会话中看到如下错误:

** (MatchError) no match of right hand side value: {:error, :closed}
    (kv_server) lib/kv_server.ex:41: KVServer.read_line/1
    (kv_server) lib/kv_server.ex:33: KVServer.serve/1
    (kv_server) lib/kv_server.ex:27: KVServer.loop_acceptor/1

这是因为我们期望从:gen_tcp.recv/2接收数据,但是客户端关闭了连接. 服务器后续的版本修订需要更好的处理这种情况.

现在有一个更重要的Bug要解决: 如果TCP acceptor崩溃会发生什么? 因为没有监视进程, 服务器异常退出并且不能处理更多后续的请求, 因为它没有重启. 这就是为什么必须把服务器放在监控树当中.

Tasks

我们已经学习过了代理(Agents), 通用服务器(Generic Servers), 以及事件管理器(Event Managers), 它们全部是适合处理多个消息或管理状态. 但是, 当我们只需要执行一些任务时,我们使用什么?

Task模块恰好提供了这个功能. 例如, 其有一个start_link/3函数, 其接受一个模块, 函数和参数, 作为监控树(Supervision tree)的一部分允许我们运行一个给定的函数.

让我们试一下. 打开lib/kv_server.ex, 修改start/2中的监控进程为如下:

def start(_type, _args) do
  import Supervisor.Spec
  children = [
    worker(Task, [KVServer, :accept, [4040]])
  ]
  opts = [strategy: :one_for_one, name: KVServer.Supervisor]
  Supervisor.start_link(children, opts)
end

With this change, we are saying that we want to run KVServer.accept(4040) as a worker.
We are hardcoding the port for now, but we will discuss ways in which this could be changed later.

现在我们向把KVServer.accept(4040)作为一个worker运行. 现在我们硬编码了端口号, 但我们将会讨论能在以后修改的方法.

现在服务器作为监控数的一部分, 当运行应用程序的时候它应该自动地启动. 在终端中键入命令mix run --no-halt, 再次使用telnet客户端验证一切仍能工作:

$ telnet 127.0.0.1 4040
Trying 127.0.0.1...
Connected to localhost.
Escape character is '^]'.
say you
say you
say me
say me

Yes, 仍然可以工作. 如果你杀掉客户端, 将导致整个服务器崩溃, 你会看到另一个服务器进程立即启动.

同时连接两个客户端, 再次测试, 你发现第二个客户端并没有echo:

$ telnet 127.0.0.1 4040
Trying 127.0.0.1...
Connected to localhost.
Escape character is '^]'.
hello
hello?
HELLOOOOOO?

这是因为我们在同一个进程中处理接受连接并处理请求. 一个客户端连接后, 同一时刻就不能在接受其他的客户端的连接了, 直到之前的请求处理完成.

任务监视器(Task supervisor)

为了使服务器能处理并发连接, 需要一个进程作为acceptor, 生成(spawns)一个额外的进程来处理请求. 解决办法是修改下面的代码:

defp loop_acceptor(socket) do
  {:ok, client} = :gen_tcp.accept(socket)
  serve(client)
  loop_acceptor(socket)
end

使用 Task.start_link/1, 类似于 Task.start_link/3, 它接受一个匿名函数作为参数, 而非模块,函数,参数:

defp loop_acceptor(socket) do
  {:ok, client} = :gen_tcp.accept(socket)
  Task.start_link(fn -> serve(client) end)
  loop_acceptor(socket)
end

我们已经犯了一次这样的错误. 记得么?

这个错误类似于当我们从registry调用KV.Bucket.start_link/0所犯的错误. 在任何bucket中的失败将带来整个registry当机.

上面的胆码有同样的瑕疵: 如果我们连接serve(client)任务到acceptor, 当处理一个请求的时候将导致acceptor崩溃, 结果所有其他的连接,断开(down)

We fixed the issue for the registry by using a simple one for one supervisor. We are going to use the same tactic here,
except that this pattern is so common with tasks that tasks already come with a solution: a simple one for one supervisor with temporary workers that we can just use in our supervision tree!

使用一个simple_one_for_one监视进程(supervisor)解决这个问题. 我们将使用相同的策略,except that this pattern is so common with tasks that tasks already come with a solution: 可以在监控树种使用一个simple_one_for_one监视器和临时的workers.

再次修改start/2, 添加一个监视进程到进程树:

def start(_type, _args) do
  import Supervisor.Spec

  children = [
    supervisor(Task.Supervisor, [[name: KVServer.TaskSupervisor]]),
    worker(Task, [KVServer, :accept, [4040]])
  ]

  opts = [strategy: :one_for_one, name: KVServer.Supervisor]
  Supervisor.start_link(children, opts)
end

使用名称KVServer.TaskSupervisor启动一个Task.Supervisor进程. 记住, 因为acceptor任务依赖此监视进程, 该监视检查必须首先启动.

现在只需要修改loop_acceptor/2使用Task.Supervisor来处理每一个请求:

defp loop_acceptor(socket) do
  {:ok, client} = :gen_tcp.accept(socket)
  Task.Supervisor.start_child(KVServer.TaskSupervisor, fn -> serve(client) end)
  loop_acceptor(socket)
end

使用命令mix run --no-halt启动一个新的服务器, 然后可以打开多个并发的telnet客户端连接. 你还注意到退出一个客户端后并不会导致acceptor崩溃. 太棒了!

这里是完整的echo服务器在单个模块中的实现:

defmodule KVServer do
  use Application

  @doc false
  def start(_type, _args) do
    import Supervisor.Spec

    children = [
      supervisor(Task.Supervisor, [[name: KVServer.TaskSupervisor]]),
      worker(Task, [KVServer, :accept, [4040]])
    ]

    opts = [strategy: :one_for_one, name: KVServer.Supervisor]
    Supervisor.start_link(children, opts)
  end

  @doc """
  Starts accepting connections on the given `port`.
  """
  def accept(port) do
    {:ok, socket} = :gen_tcp.listen(port,
                      [:binary, packet: :line, active: false])
    IO.puts "Accepting connections on port #{port}"
    loop_acceptor(socket)
  end

  defp loop_acceptor(socket) do
    {:ok, client} = :gen_tcp.accept(socket)
    Task.Supervisor.start_child(KVServer.TaskSupervisor, fn -> serve(client) end)
    loop_acceptor(socket)
  end

  defp serve(socket) do
    socket
    |> read_line()
    |> write_line(socket)

    serve(socket)
  end

  defp read_line(socket) do
    {:ok, data} = :gen_tcp.recv(socket, 0)
    data
  end

  defp write_line(line, socket) do
    :gen_tcp.send(socket, line)
  end
end

因为我们已经修改了supervisor规范, 我们需要问: 我们的supervision策略仍然正确么?

在这种情形下, 答案是yes: 如果acceptor崩溃, 并不会导致现有的连接中断.从另一方面讲, 如果任务监视器(task supervisor)崩溃, 也不会导致acceptor崩溃. 对比registry, 最初每次registry崩溃的时候也会导致supervisor崩溃, 直到使用ETS来对状态持久化.
Mix 和 OTP - ETS

文章目录
  1. 1. ETS
    1. 1.1. 作为缓存的ETS

ETS

每次我们需要查询一个bucket, 我们需要发送一个消息给registry. 在有些应用程序中这意味着registry也许变成瓶颈.

本章中,我们将学习学习ETS(Erlang Term Storage),以及如何把它用作一个缓存机制. 稍后我们将扩展其用途,持久化从监视进程到子进程的持久化数据,即使是在崩溃的时候.

警告! 别过早的使用ETS作为缓存! 记录并分析你的应用程序性能,识别哪部分是瓶颈. 这样你才知道是否应该使用缓存,以及应该缓存什么.一旦你决定了需求, 本章可作为一个如何使用ETS的例子.

作为缓存的ETS

ETS允许我们在内存表中存储任何Erlang/Elixir项式. 通过erlang的:ets模块处理ETS表:

1
iex> table = :ets.new(:buckets_registry, [:set, :protected])
8207
iex> :ets.insert(table, {"foo", self})
true
iex> :ets.lookup(table, "foo")
[{"foo", #PID<0.41.0>}]

当创建ETS表时, 要求两个必须的参数: 表的名称, 以及一组选项. 在可用的选项中,我们传递了表类型以及其访问规则. 我们选定了:set类型,表示其键在ETS表中是不能重复的.我们还设置了表的访问类型为:protected, 其含义为仅允许创建该表的进程可以对其进行写操作. 但允许所有其他进程对该ETS表进行读操作.

ETS表还可以有名称, 允许我们通过一个给定的名称来访问ETS表.

1
iex> :ets.new(:buckets_registry, [:named_table])
:buckets_registry
iex> :ets.insert(:buckets_registry, {"foo", self})
true
iex> :ets.lookup(:buckets_registry, "foo")
[{"foo", #PID<0.41.0>}]

让我们修改KV.Registry使用ETS表. 我们将使用与事件管理器, buckets supervisor相同的技术, 以及传递ETS表名称给start_link. 记住, 与服务器名称一样, 任何知道ETSB表名称的本地进程都可以方位该表.

打开lib/kv/registry.ex, 并修改其实现. 我们在被修改的部分添加了注释, 以标记我们所做的修改.

1
defmodule KV.Registry do
  use GenServer
  ## 客户端 API
  @doc """
  启动注册表.
  """
  def start_link(table, event_manager, buckets, opts \\ []) do
    # 1. 现在我们期望该表作为参数传递给服务器
    GenServer.start_link(__MODULE__, {table, event_manager, buckets}, opts)
  end
  @doc """
  查询存储在`table`中的`name`的bucket pid.
  Returns `{:ok, pid}` if a bucket exists, `:error` otherwise.
  """
  def lookup(table, name) do
    # 2. lookup now expects a table and looks directly into ETS.
    #    No request is sent to the server.
    case :ets.lookup(table, name) do
      [{^name, bucket}] -> {:ok, bucket}
      [] -> :error
    end
  end
  @doc """
  确保在`server`中有一个与给定的`name`相关的bucket.
  """
  def create(server, name) do
    GenServer.cast(server, {:create, name})
  end
  ## 服务器回调
  def init({table, events, buckets}) do
    # 3. We have replaced the names HashDict by the ETS table
    ets  = :ets.new(table, [:named_table, read_concurrency: true])
    refs = HashDict.new
    {:ok, %{names: ets, refs: refs, events: events, buckets: buckets}}
  end
  # 4. The previous handle_call callback for lookup was removed
  def handle_cast({:create, name}, state) do
    # 5. Read and write to the ETS table instead of the HashDict
    case lookup(state.names, name) do
      {:ok, _pid} ->
        {:noreply, state}
      :error ->
        {:ok, pid} = KV.Bucket.Supervisor.start_bucket(state.buckets)
        ref = Process.monitor(pid)
        refs = HashDict.put(state.refs, ref, name)
        :ets.insert(state.names, {name, pid})
        GenEvent.sync_notify(state.events, {:create, name, pid})
        {:noreply, %{state | refs: refs}}
    end
  end
  def handle_info({:DOWN, ref, :process, pid, _reason}, state) do
    # 6. Delete from the ETS table instead of the HashDict
    {name, refs} = HashDict.pop(state.refs, ref)
    :ets.delete(state.names, name)
    GenEvent.sync_notify(state.events, {:exit, name, pid})
    {:noreply, %{state | refs: refs}}
  end
  def handle_info(_msg, state) do
    {:noreply, state}
  end
end

注意:
在修改KV.Registry.lookup/2实现从服务器请求之前, 暂时直接从ETS表中读取, 多进程共享. 这是我们要实现的缓存机制的主要思路.

为了使缓存机制可以工作, 创建的ETS表需要有 :protected(默认), 这样所有的客户端才能够读取,并且仅有KV.Registry进程能够写. 当启动的时候,我们还设置了read_concurrency: true,以优化表在并发读操作场景下的性能.

The changes we have performed above have definitely broken our tests. For starters,
there is a new argument we need to pass to KV.Registry.start_link/3. Let’s start amending our tests in test/kv/registry_test.exs by rewriting the setup callback:

函数委派

函数委派

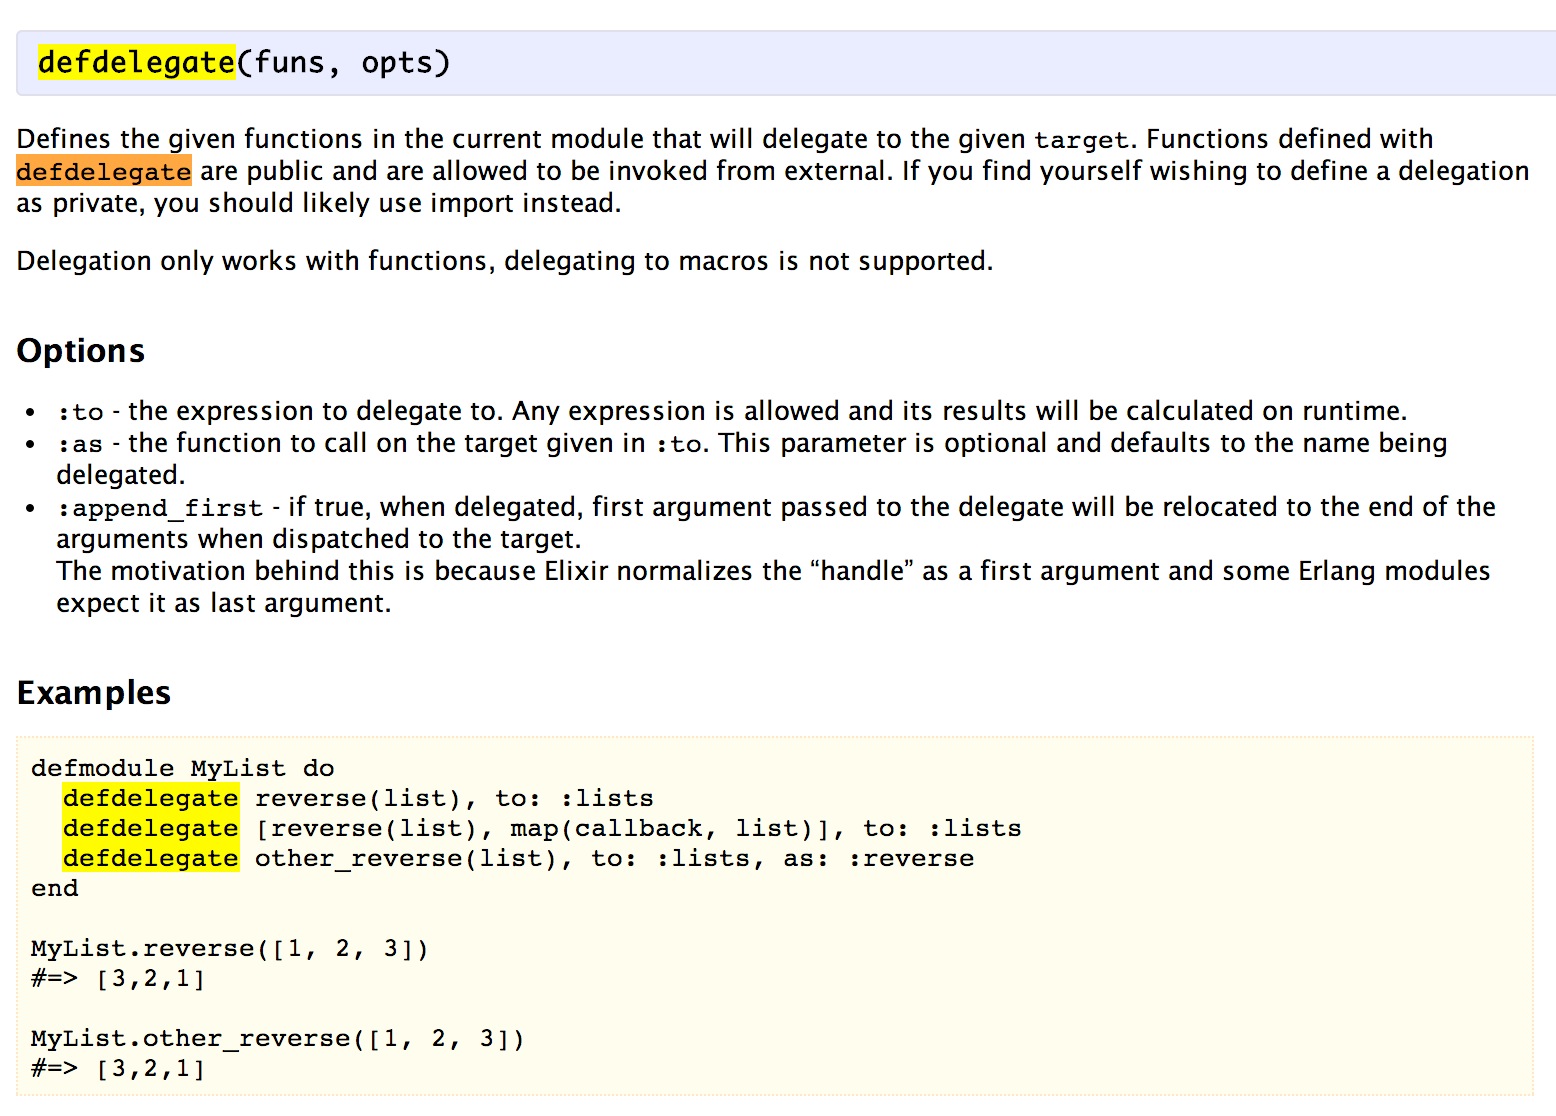
可以通过在当前模块中通过defdelegate定义一个函数,并把对该函数的调用委派给目标函数, 一个有用的场景是:

  • 把特定应用需要调用的底层模块的函数,封装到一个单独的应用模块中.

下图是defdelegate在Elixir内核中的定义

`defdelegate`在Elixir内核中的定义

收集用户输入

在控制台程序中收集用户的输入

1
# 获取用户名
input_username = IO.gets("Please input your username: ")
username = String.strip(input)
first = String.first(username)
# 获取年龄
input_age = IO.gets("Please input your age:")
age_str = String.strip(input_age)
age = String.to_integer(age_str)

Ejabberd客户连接状态变化的服务器日志分析

客户端进程被杀掉的服务器连接处理日志

客户端正常退出,服务器会收到一个流关闭标记</stream:stream>(下图右侧第一行日志), 而客户端被杀死收到不到流关闭标记(左侧).
还未分析客户端连接超时或断开的情况.

客户端正常退出和网络突然断开,服务器日志对比

N分钟学习Elixir

文章目录
  1. 1. 注释
  2. 2. 基本类型
  3. 3. 操作符
  4. 4. 控制流
  5. 5. 模块和函数
  6. 6. 结构和异常
  7. 7. 并发

获取代码: learnelixir.ex

Elixir 是构建在Erlang虚拟机上的现代函数编程语言.完全和Erlang兼容,对很多标准语法进行了扩展,并提供了更多的功能.

翻译了一部分发现,已经有中文版了, 在这里

注释

1
# 单行注释以一个#号开始.
# 没有多行注释,但可以注释多行.
# 要使用elixir shell使用`iex`命令.
# 编译模块使用`elixirc`命令.
# 如果elixir正确安装,应该都在PATH中.

基本类型

1
# 这些是数字
3    # 整数
0x1F # 整数
3.0  # 浮点数
# Atoms, that are literals, a constant with name. They start with `:`.
# 原子,是字面的,一个命名常量. 以`:`开始.
:hello # atom
# 元组在内存中是连续地存储的
{1,2,3} # tuple
# 可以使用`elem`函数访问一个元组中的元素
elem({1, 2, 3}, 0) #=> 1
# Lists that are implemented as linked lists.
[1,2,3] # list
# We can access the head and tail of a list as follows:
[head | tail] = [1,2,3]
head #=> 1
tail #=> [2,3]
# In elixir, just like in Erlang, the `=` denotes pattern matching and
# not an assignment.
#
# This means that the left-hand side (pattern) is matched against a
# right-hand side.
#
# This is how the above example of accessing the head and tail of a list works.
# A pattern match will error when the sides don't match, in this example
# the tuples have different sizes.
# {a, b, c} = {1, 2} #=> ** (MatchError) no match of right hand side value: {1,2}
# There are also binaries
<<1,2,3>> # binary
# Strings and char lists
"hello" # string
'hello' # char list
# Multi-line strings
"""
I'm a multi-line
string.
"""
#=> "I'm a multi-line\nstring.\n"
# Strings are all encoded in UTF-8:
"héllò" #=> "héllò"
# Strings are really just binaries, and char lists are just lists.
<<?a, ?b, ?c>> #=> "abc"
[?a, ?b, ?c]   #=> 'abc'
# `?a` in elixir returns the ASCII integer for the letter `a`
?a #=> 97
# To concatenate lists use `++`, for binaries use `<>`
[1,2,3] ++ [4,5]     #=> [1,2,3,4,5]
'hello ' ++ 'world'  #=> 'hello world'
<<1,2,3>> <> <<4,5>> #=> <<1,2,3,4,5>>
"hello " <> "world"  #=> "hello world"

操作符

1
# Some math
1 + 1  #=> 2
10 - 5 #=> 5
5 * 2  #=> 10
10 / 2 #=> 5.0
# In elixir the operator `/` always returns a float.
# To do integer division use `div`
div(10, 2) #=> 5
# To get the division remainder use `rem`
rem(10, 3) #=> 1
# There are also boolean operators: `or`, `and` and `not`.
# These operators expect a boolean as their first argument.
true and true #=> true
false or true #=> true
# 1 and true    #=> ** (ArgumentError) argument error
# Elixir also provides `||`, `&&` and `!` which accept arguments of any type.
# All values except `false` and `nil` will evaluate to true.
1 || true  #=> 1
false && 1 #=> false
nil && 20  #=> nil
!true #=> false
# For comparisons we have: `==`, `!=`, `===`, `!==`, `<=`, `>=`, `<` and `>`
1 == 1 #=> true
1 != 1 #=> false
1 < 2  #=> true
# `===` and `!==` are more strict when comparing integers and floats:
1 == 1.0  #=> true
1 === 1.0 #=> false
# We can also compare two different data types:
1 < :hello #=> true
# The overall sorting order is defined below:
# number < atom < reference < functions < port < pid < tuple < list < bit string
# To quote Joe Armstrong on this: "The actual order is not important,
# but that a total ordering is well defined is important."

控制流

1
# `if` expression
if false do
  "This will never be seen"
else
  "This will"
end
# There's also `unless`
unless true do
  "This will never be seen"
else
  "This will"
end
# Remember pattern matching? Many control-flow structures in elixir rely on it.
# `case` allows us to compare a value against many patterns:
case {:one, :two} do
  {:four, :five} ->
    "This won't match"
  {:one, x} ->
    "This will match and bind `x` to `:two`"
  _ ->
    "This will match any value"
end
# It's common to bind the value to `_` if we don't need it.
# For example, if only the head of a list matters to us:
[head | _] = [1,2,3]
head #=> 1
# For better readability we can do the following:
[head | _tail] = [:a, :b, :c]
head #=> :a
# `cond` lets us check for many conditions at the same time.
# Use `cond` instead of nesting many `if` expressions.
cond do
  1 + 1 == 3 ->
    "I will never be seen"
  2 * 5 == 12 ->
    "Me neither"
  1 + 2 == 3 ->
    "But I will"
end
# It is common to see the last condition equal to `true`, which will always match.
cond do
  1 + 1 == 3 ->
    "I will never be seen"
  2 * 5 == 12 ->
    "Me neither"
  true ->
    "But I will (this is essentially an else)"
end
# `try/catch` is used to catch values that are thrown, it also supports an
# `after` clause that is invoked whether or not a value is caught.
try do
  throw(:hello)
catch
  message -> "Got #{message}."
after
  IO.puts("I'm the after clause.")
end
#=> I'm the after clause
# "Got :hello"

模块和函数

1
# Anonymous functions (notice the dot)
square = fn(x) -> x * x end
square.(5) #=> 25
# They also accept many clauses and guards.
# Guards let you fine tune pattern matching,
# they are indicated by the `when` keyword:
f = fn
  x, y when x > 0 -> x + y
  x, y -> x * y
end
f.(1, 3)  #=> 4
f.(-1, 3) #=> -3
# Elixir also provides many built-in functions.
# These are available in the current scope.
is_number(10)    #=> true
is_list("hello") #=> false
elem({1,2,3}, 0) #=> 1
# You can group several functions into a module. Inside a module use `def`
# to define your functions.
defmodule Math do
  def sum(a, b) do
    a + b
  end
  def square(x) do
    x * x
  end
end
Math.sum(1, 2)  #=> 3
Math.square(3) #=> 9
# To compile our simple Math module save it as `math.ex` and use `elixirc`
# in your terminal: elixirc math.ex
# Inside a module we can define functions with `def` and private functions with `defp`.
# A function defined with `def` is available to be invoked from other modules,
# a private function can only be invoked locally.
defmodule PrivateMath do
  def sum(a, b) do
    do_sum(a, b)
  end
  defp do_sum(a, b) do
    a + b
  end
end
PrivateMath.sum(1, 2)    #=> 3
# PrivateMath.do_sum(1, 2) #=> ** (UndefinedFunctionError)
# Function declarations also support guards and multiple clauses:
defmodule Geometry do
  def area({:rectangle, w, h}) do
    w * h
  end
  def area({:circle, r}) when is_number(r) do
    3.14 * r * r
  end
end
Geometry.area({:rectangle, 2, 3}) #=> 6
Geometry.area({:circle, 3})       #=> 28.25999999999999801048
# Geometry.area({:circle, "not_a_number"})
#=> ** (FunctionClauseError) no function clause matching in Geometry.area/1
# Due to immutability, recursion is a big part of elixir
defmodule Recursion do
  def sum_list([head | tail], acc) do
    sum_list(tail, acc + head)
  end
  def sum_list([], acc) do
    acc
  end
end
Recursion.sum_list([1,2,3], 0) #=> 6
# Elixir modules support attributes, there are built-in attributes and you
# may also add custom ones.
defmodule MyMod do
  @moduledoc """
  This is a built-in attribute on a example module.
  """
  @my_data 100 # This is a custom attribute.
  IO.inspect(@my_data) #=> 100
end

结构和异常

1
# Structs are extensions on top of maps that bring default values,
# compile-time guarantees and polymorphism into Elixir.
defmodule Person do
  defstruct name: nil, age: 0, height: 0
end
joe_info = %Person{ name: "Joe", age: 30, height: 180 }
#=> %Person{age: 30, height: 180, name: "Joe"}
# Access the value of name
joe_info.name #=> "Joe"
# Update the value of age
older_joe_info = %{ joe_info | age: 31 }
#=> %Person{age: 31, height: 180, name: "Joe"}
# The `try` block with the `rescue` keyword is used to handle exceptions
try do
  raise "some error"
rescue
  RuntimeError -> "rescued a runtime error"
  _error -> "this will rescue any error"
end
# All exceptions have a message
try do
  raise "some error"
rescue
  x in [RuntimeError] ->
    x.message
end

并发

1
# Elixir relies on the actor model for concurrency. All we need to write
# concurrent programs in elixir are three primitives: spawning processes,
# sending messages and receiving messages.
# To start a new process we use the `spawn` function, which takes a function
# as argument.
f = fn -> 2 * 2 end #=> #Function<erl_eval.20.80484245>
spawn(f) #=> #PID<0.40.0>
# `spawn` returns a pid (process identifier), you can use this pid to send
# messages to the process. To do message passing we use the `send` operator.
# For all of this to be useful we need to be able to receive messages. This is
# achieved with the `receive` mechanism:
defmodule Geometry do
  def area_loop do
    receive do
      {:rectangle, w, h} ->
        IO.puts("Area = #{w * h}")
        area_loop()
      {:circle, r} ->
        IO.puts("Area = #{3.14 * r * r}")
        area_loop()
    end
  end
end
# Compile the module and create a process that evaluates `area_loop` in the shell
pid = spawn(fn -> Geometry.area_loop() end) #=> #PID<0.40.0>
# Send a message to `pid` that will match a pattern in the receive statement
send pid, {:rectangle, 2, 3}
#=> Area = 6
#   {:rectangle,2,3}
send pid, {:circle, 2}
#=> Area = 12.56000000000000049738
#   {:circle,2}
# The shell is also a process, you can use `self` to get the current pid
self() #=> #PID<0.27.0>

Emysql 执行预处理语句

1
%% 创建一个预处理语句
emysql:prepare(stmt_isbound, <<"SELECT COUNT(sn) FROM online_users WHERE sn = ? AND jid = ?">>),
%% 执行预处理语句
{_, _, _, [[Rows]], _} = emysql:execute(pool_gbox_messager, stmt_isbound, [Sn, Jid]),
?INFO_MSG("COUNT: ~p~n", [Rows])

Ejabberd动态的重新加载(更新)修改的模块

文章目录
  1. 1. 示例
  2. 2. 通过Web更新模块代码
  3. 3. Bugfix

有时候我们不想停止ejabberd服务,同时能够更新我们的自定义模块,ejabberd已经为我们提供了这样一个功能.通过使用ejabberd的ejabberd_update核心模块, 我们可以在运行时重新加载我们的模块新代码.

ejabberd_update核心模块为我们提供了如下三个导出的接口函数:

1
-export([
    %% Update all the modified modules
    update/0,
    %% Update only the specified modules
    update/1,
    %% Get information about the modified modules
    update_info/0
]).

示例

该示例假设你已经搭建好了Ejabberd的开发环境,如果还未搭建号开发环境,请完成开发环境的搭建.

  • 首先停止ejabberd
1
ejabberdctl stop
  • 启动到live模式
1
ejabberdctl live
  • 更新一个模块文件/编译/安装
1
make && make install
  • 查看需要更新的模块列表

打开一个新的终端执行,查看哪些模块代码需要更新

1
root@bffd81e6215e:~/ejabberd# ejabberdctl update_list
mod_gbox_messager

我们看到,update_list命令列出了我们需要更新的模块mod_gbox_messager

  • 切换到live模式的窗口执行

为了清晰,下面的输出通过手工格式化

1
(ejabberd@localhost)2> ejabberd_update:update().
07:57:08.491 [debug] beam files: [mod_gbox_messager]
07:57:08.492 [debug] script: [{load_module,mod_gbox_messager}]
07:57:08.492 [debug] low level script: [
    {
        load_object_code,
        {
            ejabberd,[],[mod_gbox_messager]
        }
    },
    point_of_no_return,{
        load,{
            mod_gbox_messager,
            brutal_purge,brutal_purge
        }
    }
]
07:57:08.492 [debug] check: {ok,[]}
07:57:08.497 [debug] eval: {ok,[]}
  • 获取更新信息
1
(ejabberd@localhost)4> ejabberd_update:update_info().
08:25:24.357 [debug] beam files: [mod_gbox_messager]
08:25:24.358 [debug] script: [{load_module,mod_gbox_messager}]
08:25:24.358 [debug] low level script: [
    {
        load_object_code,
        {ejabberd,[],[mod_gbox_messager]}
    },
    point_of_no_return,
    {load,{mod_gbox_messager,brutal_purge,brutal_purge}}
]
08:25:24.358 [debug] check: {ok,[]}
{
    ok,
    "/lib/ejabberd/ebin",
    [mod_gbox_messager],
    [{load_module,mod_gbox_messager}],
    [
        {load_object_code,{ejabberd,[],[mod_gbox_messager]}},
        point_of_no_return,
        {load,{mod_gbox_messager,brutal_purge,brutal_purge}}
    ],
    ok
}

ejabberd_update:update_info()返回一个元组,其中包含了beam文件的位置/lib/ejabberd/ebin, 要加载的模块列表[{load_module,mod_gbox_messager}]等, 我们可以在我们的HTTP模块代码中使用,比如:

1
%% 打印需要更新的模块
print_modules() ->
    {ok,_Ebin,Modules,_,_,_} = ejabberd_update:update_info,
    ?INFO_MSG("modules to update: ~p~n", [Modules]).

通过Web更新模块代码

开发一个Ejabberd的HTTP模块,(如何开发Ejabberd的HTTP模块,请参考 开发一个Ejabberd HTTP模块) 并通过RESTFul接口动态地更新模块代码

下面我们来定义两个RESTFul服务的端点

1
GET http://localhost/update-modules/all
POST http://localhost/update-modules
  • 第一个端点用于更新所有已修改的模块
  • 第二个端点用于更新特定的模块列表,POST的数据格式采用JSON

为了能在HTTP模块中解码JSON数据,这里用到了Jiffy模块用于处理JSON数据的encode/decode操作. 关于Jiffy的使用,可参考 Ejabberd中用Jiffy输出JSON数据,有了这样一个功能,我们可以开发Ejabberd的自定义的HTTP模块通过Web动态地更新我们的模块.

如果更新成功ejabberd_update:update/0会返回{ok,[]},可依据此判断更新过程是否成功,并返回JSON消息通知客户端更新结果.

Bugfix

  • 2014-10-23

ejabberdctl live启动后是没有加载ejabberd_update模块的, 需要执行ejabberdctl加载一次ejabberd_update模块, 如果是通过程序调用更新,调用时会自动加载更新模块. 所以要先执行一个ejabberdctl update_list手工初始化ejabberd_update模块.

Erlang程序模型,我们是怎么思考和交互的

我们没有共享的记忆(memory),我有我的记忆,你有你的. 我们有两个大脑,每人一个. 它们并没有相连. 要修改你的记忆,我发送一个消息给你: 我给你说,或我挥一挥手.

你听着,你看着,你的记忆在改变;但我们并没有问你问题或者观察你的反应,我不知道你收到了我的消息.

这就是Erlang进程的工作方式. Erlang进程没有共享内存. 每一个进程有它自己的内存. 要改变其他进程的内存,你必须给它发消息,并期望它能收到并理解消息.

为了确认另一个进程收到了你的消息,并且改变了它的内存,你必须问它(通过发送消息给它). 这正是我们的交互方式:

我: 嘿,亲爱的,我的电话号码是138-1234-1234.
我: 你记住了么?
她: 记住了,你的号码是 138-1234-1234

这个交互模式对我们来说是众所周知的.

从出生开始,我们通过观察学习与这个世界交互,给这个世界发出消息,并观察其反应.

人们作为独立的个体依靠消息通信.

这就是Erlang进程的工作模式,这也是我们的工作模式,因此,理解一个Erlang程序就变得容易了.

一个Erlang程序也许由十几个,或成百上千的细小的进程组成. 所有这些进程都独立的运行,它们之间依靠收发消息通信.每一个进程都有私有的内存. 这就像在一个超大的房间内所有人在相互交谈一样.

Erlang标准库示例 lists

keysearch(Key, N, TupleList) -> {value, Tuple} | false

Types:

Key = term()
N = integer() >= 1
1..tuple_size(Tuple)
TupleList = [Tuple]
Tuple = tuple()

在一个元组列表中搜索, 列表中元组的第N个元素等于Key时返回 {value, Tuple},其中Tuple为找到的这个元组. 如果没有找到返回false.

Note
该函数的保留是为了兼容, 使用lists:keyfind/3(R13A引入的一个方法)更加方便.

例子

lists:keysearch/3

1
1> lists:keysearch(mail,1, [{username, "13012345678"}, {mail, "13012345678@139.com"}, {tel, 13012345678}]).
{value,{mail,"13012345678@139.com"}}

lists:keyfind/3

1
3> lists:keyfind(mail,1, [{username, "13012345678"}, {mail, "13012345678@139.com"}, {tel, 13012345678}]).
{mail,"13012345678@139.com"}

注意lists:keysearch/3lists:keyfind/3返回值的差异.

Ejabberd XML格式的XMPP消息日志模块

mod_logxml.erl模块配置
1
modules:
  mod_logxml:
    #stanza: [message, other]
    #direction: [internal, vhosts, external]
    #orientation: [send, recv]
    logdir: "/var/log/ejabberd/xmllogs"
    #timezone: universal
    #rotate_days: 10
    rotate_megs: 1000000
    #rotate_kpackets: no
    #check_rotate_kpackets: 1

模块文件, 完整文件,请点击右侧mod_logxml.erl连接

Ejabberd mod_logxml模块,记录stanza到XML日志文件中mod_logxml.erl
1
2
3
4
5
6
7
8
9
10
11
12
13
14
15
16
17
18
19
20
21
22
23
24
25
26
27
28
29
30
31
32
33
34
35
36
37
38
39
40
41
42
43
44
45
46
47
48
49
50
51
52
53
54
55
56
57
58
59
60
61
62
63
64
65
66
67
68
69
70
-module(mod_logxml).
-author('badlop@ono.com').
-behaviour(gen_mod).
-export([
start/2,
init/7,
stop/1,
send_packet/3,
receive_packet/4
])
.

-include("ejabberd.hrl").
-include("logger.hrl").
-include("jlib.hrl").
-define(PROCNAME, ejabberd_mod_logxml).
start(Host, Opts) ->
%% 日志存储目录
Logdir = gen_mod:get_opt(logdir, Opts, fun(A) -> A end, "/tmp/jabberlogs/"),
?DEBUG("EJABBERD_MOD_LOGXML Logdir: ~p", [Logdir]),
%% 日志滚动天数
Rd = gen_mod:get_opt(rotate_days, Opts, fun(A) -> A end, 1),
?DEBUG("EJABBERD_MOD_LOGXML Rd: ~p", [Rd]),
%% 日志滚动兆字节数,默认日志文件满10MB后创建新文件记录当前日志输出
Rf = case gen_mod:get_opt(rotate_megs, Opts, fun(A) -> A end, 10) of
no -> no;
Rf1 -> Rf1 * 1024 * 1024
end,
?DEBUG("EJABBERD_MOD_LOGXML Rf: ~p", [Rf]),
%% 按接收到的XMPP数据包的数量滚动
Rp = case gen_mod:get_opt(rotate_kpackets, Opts, fun(A) -> A end, 10) of
no -> no;
Rp1 -> Rp1 * 1000
end,
?DEBUG("EJABBERD_MOD_LOGXML Rp: ~p", [Rp]),
%% 日志滚动选项
RotateO = {Rd, Rf, Rp},
CheckRKP = gen_mod:get_opt(check_rotate_kpackets, Opts, fun(A) -> A end, 1),
?DEBUG("EJABBERD_MOD_LOGXML RotateO: ~p", [RotateO]),
%% 时区配置选项
Timezone = gen_mod:get_opt(timezone, Opts, fun(A) -> A end, local),
?DEBUG("EJABBERD_MOD_LOGXML Timezone: ~p", [Timezone]),
%% 数据流方向
Orientation = gen_mod:get_opt(orientation, Opts, fun(A) -> A end, [send, recv]),
?DEBUG("EJABBERD_MOD_LOGXML Orientation: ~p", [Orientation]),
%% XMPP节
Stanza = gen_mod:get_opt(stanza, Opts, fun(A) -> A end, [iq, message, presence, other]),
?DEBUG("EJABBERD_MOD_LOGXML Stanza: ~p", [Stanza]),
%% 连接方向
Direction = gen_mod:get_opt(direction, Opts, fun(A) -> A end, [internal, vhosts, external]),
?DEBUG("EJABBERD_MOD_LOGXML Direction: ~p", [Direction]),
%% 过滤器选项
FilterO = {
{orientation, Orientation},
{stanza, Stanza},
{direction, Direction}},

%% 是否显示IP地址
ShowIP = gen_mod:get_opt(show_ip, Opts, fun(A) -> A end, false),
?DEBUG("EJABBERD_MOD_LOGXML ShowIP: ~p", [ShowIP]),
%% 用户收发XMPP数据包钩子
ejabberd_hooks:add(user_send_packet, Host, ?MODULE, send_packet, 90),
ejabberd_hooks:add(user_receive_packet, Host, ?MODULE, receive_packet, 90),
%% 进程注册
register(
%% 获取模块
gen_mod:get_module_proc(Host, ?PROCNAME),
spawn(?MODULE, init, [Host, Logdir, RotateO, CheckRKP, Timezone, ShowIP, FilterO])
).
...
...
...
省略

格式化输出

格式化XML
1
2
3
4
5
6
7
8
9
10
11
12
13
14
15
16
#!/usr/bin/python
import tail
import xml.dom.minidom

def pretty_print(xml_string):
fragment = xml.dom.minidom.parseString(xml_string)
string = fragment.toprettyxml(indent=" ", newl="\n", encoding="utf-8")
print(string)
# Create a tail instance
t = tail.Tail('xmpp.hezhiqiang.info.xml')
# Register a callback function to be called when a new line is found in the followed file.
# If no callback function is registerd, new lines would be printed to standard out.
t.register_callback(pretty_print)
# Follow the file with 5 seconds as sleep time between iterations.
# If sleep time is not provided 1 second is used as the default time.
t.follow(s=1)

参考资料

  1. http://stackoverflow.com/questions/24012466/xmpp-traffic-logging-ejabberd-13-12
  2. http://stackoverflow.com/questions/749796/pretty-printing-xml-in-python
  3. https://github.com/kasun/python-tail
  4. https://docs.python.org/2/library/xml.dom.minidom.html

文档工具

内置文档生成

在Elixir中,文档是一等公民, Elixir对其有内置的支持, 不需要第三方文档生成工具. 只需要使用@doc标签即可

函数文档

  • 创建一个文件hello.exs如下:
1
# Elixir module
defmodule Test do
    @doc """
    一个Echo方法用于输出Hello World.
    """
    def echo do
        IO.puts "Hello World!"
    end
end
  • 进入交互式shell
1
root# iex
  • 编译模块
1
iex(1)> c("hello.exs")

模块编译会在当前目录下生成一个Elixir.Test.beam BEAM文件.

  • 查看文档

在Elixir交互式Shell中查看函数文档

模块文档

@moduledoc

函数参数和返回类型规范

函数定义的类型规范是通过@spec标签定义的

用ExDoc生成文档

  • mix创建一个新项目

    1
    root@fd4cc081e295:~/ejabberd/elixir# mix new docs
    * creating README.md
    * creating .gitignore
    * creating mix.exs
    * creating config
    * creating config/config.exs
    * creating lib
    * creating lib/docs.ex
    * creating test
    * creating test/test_helper.exs
    * creating test/docs_test.exs
    Your mix project was created successfully.
    You can use mix to compile it, test it, and more:
        cd docs
        mix test
    Run `mix help` for more commands.
  • 编辑mix.exs,添加依赖模块

    1
    defmodule Docs.Mixfile do
      use Mix.Project
      def project do
        [app: :docs,
         version: "0.0.1",
         elixir: "~> 1.0",
         deps: deps]
      end
      # Configuration for the OTP application
      #
      # Type `mix help compile.app` for more information
      def application do
        [applications: [:logger]]
      end
      # Dependencies can be Hex packages:
      #
      #   {:mydep, "~> 0.3.0"}
      #
      # Or git/path repositories:
      #
      #   {:mydep, git: "https://github.com/elixir-lang/mydep.git", tag: "0.1.0"}
      #
      # Type `mix help deps` for more examples and options
      defp deps do
        [{:ex_doc, github: "elixir-lang/ex_doc"}]
      end
    end
  • 安装依赖

1
root@fd4cc081e295:~/elixir/docs# mix deps.get
* Updating ex_doc (git://github.com/elixir-lang/ex_doc.git)
==> ex_doc
Could not find hex, which is needed to build dependency :earmark
Shall I install hex? [Yn] Y
2014-10-13 09:07:56 URL:https://s3.amazonaws.com/s3.hex.pm/installs/hex.ez [240877/240877] -> "/root/.mix/archives/hex.ez" [1]
* creating /root/.mix/archives/hex.ez
  • 生成文档
1
mix docs

ExDoc中文模板

下载地址:
https://github.com/developerworks/ex_doc

ExDoc中文模板

第一印象

Elixir 依赖与Erlang/OTP 17,需要首先安装Erlang, 这里不讲解如何安装Erlang, 这里说明如何编译和使用Elixir

编译

1
# 下载
wget https://github.com/elixir-lang/elixir/archive/v1.0.1.tar.gz
# 解压
tar zxf v1.0.1.tar.gz
cd elixir-1.0.1
make

配置路径

1
export PATH=/root/elixir-1.0.1/bin:$PATH

交互式Shell

1
root@fd4cc081e295:~/elixir-1.0.1/bin# iex
Erlang/OTP 17 [erts-6.2] [source] [64-bit] [async-threads:10] [kernel-poll:false]
Interactive Elixir (1.0.1) - press Ctrl+C to exit (type h() ENTER for help)
iex(1)>

输入h()显示如下帮助

Elixir交互式Shell

Hell World

1
IO.puts "Hello World!

执行

1
root@fd4cc081e295:~/elixir# elixir hello.exs
Hello World!

MySQL数据库协议包分析

本文的分析角度,是从Erlang语言的emsyql客户端库作为分析案例,通过对emysql库源码的阅读来分析MySQL数据库的协议包结构.并描述了MySQL协议包的结构,如何处理查询结果,如何处理错误信息等协议层内部机制.

首先从最常用的协议包开始:

结果集协议包

顾名思义, 该协议包定义了从MySQL数据库返回的结果集的包格式. 既然是结果集协议包,其中包含我们查询的字段列表.在emysql中定义的字段类型如下:

MySQL类型emysql.hrl
1
2
3
4
5
6
7
8
9
10
11
12
13
14
15
16
17
18
19
20
21
22
23
24
25
26
27
28
%% MYSQL TYPES
-define(FIELD_TYPE_DECIMAL, 16#00).
-define(FIELD_TYPE_TINY, 16#01).
-define(FIELD_TYPE_SHORT, 16#02).
-define(FIELD_TYPE_LONG, 16#03).
-define(FIELD_TYPE_FLOAT, 16#04).
-define(FIELD_TYPE_DOUBLE, 16#05).
-define(FIELD_TYPE_NULL, 16#06).
-define(FIELD_TYPE_TIMESTAMP, 16#07).
-define(FIELD_TYPE_LONGLONG, 16#08).
-define(FIELD_TYPE_INT24, 16#09).
-define(FIELD_TYPE_DATE, 16#0a).
-define(FIELD_TYPE_TIME, 16#0b).
-define(FIELD_TYPE_DATETIME, 16#0c).
-define(FIELD_TYPE_YEAR, 16#0d).
-define(FIELD_TYPE_NEWDATE, 16#0e).
-define(FIELD_TYPE_VARCHAR, 16#0f).
-define(FIELD_TYPE_BIT, 16#10).
-define(FIELD_TYPE_NEWDECIMAL, 16#f6).
-define(FIELD_TYPE_ENUM, 16#f7).
-define(FIELD_TYPE_SET, 16#f8).
-define(FIELD_TYPE_TINY_BLOB, 16#f9).
-define(FIELD_TYPE_MEDIUM_BLOB, 16#fa).
-define(FIELD_TYPE_LONG_BLOB, 16#fb).
-define(FIELD_TYPE_BLOB, 16#fc).
-define(FIELD_TYPE_VAR_STRING, 16#fd).
-define(FIELD_TYPE_STRING, 16#fe).
-define(FIELD_TYPE_GEOMETRY, 16#ff).

每一种类型,用一个16进制数字来标记. 以Erlang宏定义的方式声明了不同字段数据类型的值.

TODO::

Ejabberd与Emysql集成


开发模块需要使用到MySQL数据库,本文描述如何把Emysql集成到Ejabberd中.

修改Ejabberd

编辑$EJABBERD_SRC/rebar.config.script

配置Deps,增加Emysql依赖

配置rebar.config.script
1
Deps = [
    ...
    {emysql, ".*", {git, "git://github.com/Eonblast/Emysql.git"}}
],

如果已经编译过了ejabberd,请删除deps/.built, deps/.got两个文件, 并执行make

编译输出
1
root@fd4cc081e295:~/ejabberd# make
...
==> emysql (compile)
Generating "include/crypto_compat.hrl" ...
...supports cryto:hash/2
...writing "include/crypto_compat.hrl"
Compiled src/emysql.erl
Compiled src/emysql_worker.erl
Compiled src/emysql_conn_mgr.erl
Compiled src/emysql_sup.erl
Compiled src/emysql_util.erl
Compiled src/emysql_conn.erl
Compiled src/emysql_app.erl
Compiled src/emysql_statements.erl
Compiled src/emysql_auth.erl
Compiled src/emysql_conv.erl
Compiled src/emysql_tcp.erl
==> p1_mysql (compile)
==> p1_zlib (compile)
==> jiffy (compile)
==> goldrush (compile)
==> lager (compile)
==> p1_iconv (compile)
==> rel (compile)
==> ejabberd (compile)
Compiled src/mod_gbox_messager.erl
Compiled src/mod_online_users.erl
Compiled src/mod_cputime.erl
Compiled src/mod_system_information.erl
/usr/lib/erlang/bin/escript rebar skip_deps=true compile
==> rel (compile)
==> ejabberd (compile)

下载安装samples数据库

下载安装samples数据库
1
wget https://launchpad.net/test-db/employees-db-1/1.0.6/+download/employees_db-full-1.0.6.tar.bz2
tar jxf employees_db-full-1.0.6.tar.bz2
cd employees_db
mysql -t < employees.sql

修改模块

获取CPU时间模块mod_cputime.erl
1
2
3
4
5
6
7
8
9
10
11
12
13
14
15
16
17
18
19
20
21
22
23
24
25
26
27
28
29
30
31
32
33
34
35
36
37
38
39
40
41
42
43
44
45
46
47
48
49
50
51
52
53
54
55
56
57
58
59
60
61
62
63
64
65
66
67
68
69
70
71
72
73
74
75
76
77
78
79
80
81
82
83
84
85
-module(mod_cputime).
-behaviour(gen_mod).
-export([
start/2,
stop/1,
process_local_iq/3
])
.

-include("ejabberd.hrl").
-include("jlib.hrl").
-include("logger.hrl").
-define(JUD_MATCHES, macro_body).
-define(NS_CPUTIME, <<"ejabberd:cputime">>).
start(Host, Opts) ->
IQDisc = gen_mod:get_opt(
iqdisc,
Opts,
fun gen_iq_handler:check_type/1,
one_queue
),
mod_disco:register_feature(Host, ?NS_CPUTIME),
gen_iq_handler:add_iq_handler(ejabberd_local, Host, ?NS_CPUTIME, ?MODULE, process_local_iq, IQDisc),
crypto:start(),
application:start(emysql),
Server = gen_mod:get_module_opt(Host,
?MODULE, server, fun(Server) -> binary_to_list(Server) end, "localhost"),
Port = gen_mod:get_module_opt(Host,
?MODULE, port, fun(Port) -> Port end, 3306),
Database = gen_mod:get_module_opt(Host,
?MODULE, database, fun(Database) -> binary_to_list(Database) end, "mysql"),
User = gen_mod:get_module_opt(Host,
?MODULE, user, fun(User) -> User end, "root"),
Password = gen_mod:get_module_opt(Host,
?MODULE, password, fun(Password) -> binary_to_list(Password) end, "root"),
PoolSize = gen_mod:get_module_opt(Host,
?MODULE, poolsize, fun(PoolSize) -> PoolSize end, 1),
Encoding = gen_mod:get_module_opt(Host,
?MODULE, encoding, fun(Encoding) -> list_to_atom(binary_to_list(Encoding)) end, utf8),
?DEBUG("MySQL Server: ~p~n", [Server]),
?DEBUG("MySQL Port: ~p~n", [Port]),
?DEBUG("MySQL DB: ~p~n", [Database]),
?DEBUG("MySQL User: ~p~n", [User]),
?DEBUG("MySQL Password: ~p~n", [Password]),
?DEBUG("MySQL PoolSize: ~p~n", [PoolSize]),
?DEBUG("MySQL Encoding: ~p~n", [Encoding]),
emysql:add_pool(pool_employees, [
{size, PoolSize},
{user, User},
{password, Password},
{host, Server},
{port, Port},
{database, Database},
{encoding, Encoding}
]),
{_, _, _, Result, _} = emysql:execute(pool_employees, <<"SELECT * FROM employees LIMIT 10">>),
%% [
%% [10001,{date,{1953,9,2}},<<"Georgi">>,<<"Facello">>,<<"M">>,{date,{1986,6,26}}],
%% [10002,{date,{1964,6,2}},<<"Bezalel">>,<<"Simmel">>,<<"F">>,{date,{1985,11,21}}],
%% [10003,{date,{1959,12,3}},<<"Parto">>,<<"Bamford">>,<<"M">>,{date,{1986,8,28}}],
%% [10004,{date,{1954,5,1}},<<"Chirstian">>,<<"Koblick">>,<<"M">>,{date,{1986,12,1}}],
%% [10005,{date,{1955,1,21}},<<"Kyoichi">>,<<"Maliniak">>,<<"M">>,{date,{1989,9,12}}],
%% [10006,{date,{1953,4,20}},<<"Anneke">>,<<"Preusig">>,<<"F">>,{date,{1989,6,2}}],
%% [10007,{date,{1957,5,23}},<<"Tzvetan">>,<<"Zielinski">>,<<"F">>,{date,{1989,2,10}}],
%% [10008,{date,{1958,2,19}},<<"Saniya">>,<<"Kalloufi">>,<<"M">>,{date,{1994,9,15}}],
%% [10009,{date,{1952,4,19}},<<"Sumant">>,<<"Peac">>,<<"F">>,{date,{1985,2,18}}],
%% [10010,{date,{1963,6,1}},<<"Duangkaew">>,<<"Piveteau">>,<<"F">>,{date,{1989,8,24}}]
%% ].
?DEBUG("============================~n~p~n", [Result]),
ok.
stop(Host) ->
mod_disco:unregister_feature(Host, ?NS_CPUTIME),
gen_iq_handler:remove_iq_handler(ejabberd_local, Host, ?NS_CPUTIME),
ok.
process_local_iq(_From, _To, #iq{type = Type, sub_el = SubEl} = IQ) ->
case Type of
set ->
IQ#iq{type = error, sub_el = [SubEl, ?ERR_NOT_ALLOWED]};
get ->
CPUTime = element(1, erlang:statistics(runtime)) / 1000,
SCPUTime = lists:flatten(io_lib:format("~.3f", [CPUTime])),
Packet = IQ#iq{type = result, sub_el = [
#xmlel{name = <<"query">>, attrs = [{<<"xmlns">>, ?NS_CPUTIME}], children = [
#xmlel{name = <<"time">>, attrs = [], children = [{xmlcdata, list_to_binary(SCPUTime)}]}]}
]},
Packet
end.

查询结果日志输出

查询结果日志输出

参考资料

  1. http://dev.mysql.com/doc/employee/en/employees-installation.html

Ejabberd代码分析之-翻译辅助工具

Ejabberd支持国际化,在<iq/>,<message/>,<presence/>等元素上添加xml:lang属性,对应的英文文本会切换到指定的语言.

举个例子,模块mod_announce.erl代码内有如下对translate:translate()的使用:

1
get_title(Lang, <<"announce">>) ->
    translate:translate(Lang, <<"Announcements">>);
get_title(Lang, ?NS_ADMIN_ANNOUNCE_ALL) ->
    translate:translate(Lang, <<"Send announcement to all users">>);
get_title(Lang, ?NS_ADMIN_ANNOUNCE_ALL_ALLHOSTS) ->
    translate:translate(Lang, <<"Send announcement to all users on all hosts">>);
get_title(Lang, ?NS_ADMIN_ANNOUNCE) ->
    translate:translate(Lang, <<"Send announcement to all online users">>);
get_title(Lang, ?NS_ADMIN_ANNOUNCE_ALLHOSTS) ->
    translate:translate(Lang, <<"Send announcement to all online users on all hosts">>);
get_title(Lang, ?NS_ADMIN_SET_MOTD) ->
    translate:translate(Lang, <<"Set message of the day and send to online users">>);
get_title(Lang, ?NS_ADMIN_SET_MOTD_ALLHOSTS) ->
    translate:translate(Lang, <<"Set message of the day on all hosts and send to online users">>);
get_title(Lang, ?NS_ADMIN_EDIT_MOTD) ->
    translate:translate(Lang, <<"Update message of the day (don't send)">>);
get_title(Lang, ?NS_ADMIN_EDIT_MOTD_ALLHOSTS) ->
    translate:translate(Lang, <<"Update message of the day on all hosts (don't send)">>);
get_title(Lang, ?NS_ADMIN_DELETE_MOTD) ->
    translate:translate(Lang, <<"Delete message of the day">>);
get_title(Lang, ?NS_ADMIN_DELETE_MOTD_ALLHOSTS) ->
    translate:translate(Lang, <<"Delete message of the day on all hosts">>).

translate:translate()定义在translate.erl模块中.

1
-spec translate(binary(), binary()) -> binary().
translate(Lang, Msg) ->
    LLang = ascii_tolower(Lang),
    case ets:lookup(translations, {LLang, Msg}) of
      [{_, Trans}] -> Trans;
      _ ->
	  ShortLang = case str:tokens(LLang, <<"-">>) of
			[] -> LLang;
			[SL | _] -> SL
		      end,
	  case ShortLang of
	    <<"en">> -> Msg;
	    LLang -> translate(Msg);
	    _ ->
		case ets:lookup(translations, {ShortLang, Msg}) of
		  [{_, Trans}] -> Trans;
		  _ -> translate(Msg)
		end
	  end
    end.

当你在XML节上定义了xml:lang='zh'属性后,服务端的应答文本就变为中文了, 如下:

Erlang国际化文本-服务节点列表

增加自定义字符串

搞清楚了原理后,我就可以为我的模块添加字符串了.

首先我在我的模块中使用英文作为默认的文本描述, 如下所示:

1
#xmlel{
    name = <<"item">>,
    attrs = [
        {<<"jid">>, Server},
        {<<"node">>, <<"http://www.example.com/protocol/messager#upgrade-full">>},
        {<<"name">>, translate:translate(Lang, <<"Make a complete upgrade">>)}
    ],
    children = []
}

然后根据$EJABBERD_SRC/contrib/extract_translations/README的描述,
需要编译$EJABBERD_SRC/contrib/extract_translations/extract_translations.erl模块.

1
erlc $EJABBERD_SRC/contrib/extract_translations/extract_translations.erl

Ejabberd提供了一个SHELL脚本来从*.po文件生成Ejabberd需要的*.msg文件.

1
root@4850618fe551:~/ejabberd/contrib/extract_translations# ./prepare-translation.sh -h
Options:
  -langall
  -lang LANGUAGE_FILE
  -srcmsg2po LANGUAGE   Construct .msg file using source code to PO file
  -src2pot              Generate template POT file from source code
  -popot2po LANGUAGE    Update PO file with template POT file
  -po2msg LANGUAGE      Export PO file to MSG file
  -updateall            Generate POT and update all PO
Example:
  ./prepare-translation.sh -lang es.msg

首先切换到源码根目录, 执行:

1
root@4850618fe551:~/ejabberd# ./contrib/extract_translations/prepare-translation.sh -src2pot
./contrib/extract_translations/prepare-translation.sh: line 183: msguniq: command not found

找不到msguniq命令,在Ubuntu上,msguniqgettext包种, 下面安装需要的软件包:

1
aptitude install -y gettext

执行下面的命令, 更新ejabberd.pot文件:

1
root@4850618fe551:~/ejabberd# ./contrib/extract_translations/prepare-translation.sh -src2pot

打开$EJABBERD_SRC/priv/msgs/ejabberd.pot, 翻译相关条目后, 复制粘贴到到$EJABBERD_SRC/priv/msgs/zh.po中,

$EJABBERD_SRC/priv/msgs/ejabberd.pot

并执行下面的命令,更新我的zh.msg文件, 这个文件是在Erlang代码中直接使用的文件. 后面会看到最终的效果.

1
./contrib/extract_translations/prepare-translation.sh -po2msg zh

更新后的消息文件在$EJABBERD_SRC/priv/msgs/zh.msg

$EJABBERD_SRC/priv/msgs/zh.msg

生成了我最终要的zh.msg文件后,重新编译一次ejabberd(之前已经编译过,这一步很快)

1
root@4850618fe551:~/ejabberd# make
/usr/lib/erlang/bin/escript rebar skip_deps=true compile
==> rel (compile)
==> ejabberd (compile)
Compiled src/mod_online_users.erl
Compiled src/mod_gbox_messager.erl
Compiled src/mod_cputime.erl
Compiled src/mod_system_information.erl

复制编译的新文件

1
cp ebin/*.beam /lib/ejabberd/ebin
cp priv/*.msg /lib/ejabberd/priv/msgs

最后重启,并测试

1
ejabberdctl restart

查询命令列表(注意属性xml:lang='zh')

1
<iq type='get' to='xmpp.myserver.info' from='root@xmpp.myserver.info' xml:lang='zh' xmlns='jabber:client'>
  <query xmlns='http://jabber.org/protocol/disco#items' node='http://jabber.org/protocol/commands'/>
</iq>

国际化后的结果

自定义Ad-Hoc Commands

参考资料

  1. $EJABBERD_SRC/src/mod_announce.erl
  2. $EJABBERD_SRC/contrib/extract_translations/README
  3. $EJABBERD_SRC/src/translate.erl

XMPP 物联网相关协议扩展

XMPP/IoT相关协议

服务开通(英语:Provisioning)是一个电信行业的技术词汇,它是指准备和配备(preparing and equipping)一个网络,以允许其向它的用户提供(新)业务的处理过程.在(美国)国家安全/紧急准备电子通信(NS/EP telecommunications)业务中,服务开通等同于开始(initiation),并且包括改变一个已存在的优先服务或功能的状态.
英语Provisioning,的原意是供应,预备,电信行业中一般将其翻译成中文服务开通.也有文档称其为开通,服务提供,服务供应等.

  • 0322: EXI
  • 0323: Sensor Data
  • 0324: Provisioning
  • 0325: Control
  • 0326: Concentrators
  • 0331: Color fields
  • 0332: HTTP over XMpp
  • 0336: Dynamic Forms
  • 0347: Discovery
  • ?: Interoperability
  • ?: Events
  • ?: Pubsub
  • ?: Multicast
  • ?: Chat
  • ?: Battery powered devices

OneM2M联盟规范文档

oneM2M是7个国家的电信联盟组成的合作机构,定制物联网机器到机器(M2M)应用层通信标准.

  • 无线通讯解决方案联盟(ATIS)
  • 中国通讯标准化协会(CCSA)
  • 欧洲电信标准协会(ETSI)
  • 韩国电信技术协会(TTA)
  • 日本电信技术委员会(TTC)
  • 美国电信工业协会(TIA)
  • 及日本电波产业协会(ARIB)

http://www.onem2m.org/candidate_release/index.cfm

M2M在线
http://m2m.iot-online.com/

功能架构
TS-0001-oneM2M-Functional-Architecture-V-2014-08
需求
TS-0002-Requirements-V-2014-08
安全方案
TS-0003-Security_Solutions-V-2014-08
核心协议
TS-0004-CoreProtocol-V-2014-08
管理(OMA)
TS-0005-Management_Enablement (OMA)-V-2014-08
管理(BBF)
TS-0006-ManagementEnablement(BBF)-V-2014-08
CoAP协议绑定
TS-0008-CoAP_Protocol_Binding-V-2014-08
HTTP协议绑定
TS-0009-HTTP_Protocol_Binding_V-2014-08
定义和缩写词
TS-0011-Definitions and Acronyms-V-2014-08

资料

  1. XMPP Service Discovery extensions for M2M and IoT
    http://servicelab.org/2013/02/21/xmpp-service-discovery-extensions-for-m2m-and-iot/

  2. oneM2M 候选规范
    http://www.onem2m.org/candidate_release/index.cfm

  3. http://m2m.iot-online.com/news/2013102224849.html